A Comprehensive Step-by-Step Guide by J&D Sprayers & Makeovers
French polishing is a revered wood finishing method known for its luxurious high-gloss finish and the depth it brings to natural wood grain. This age-old technique, often seen on antiques and high-end furniture, involves applying many thin layers of shellac using a soft pad.
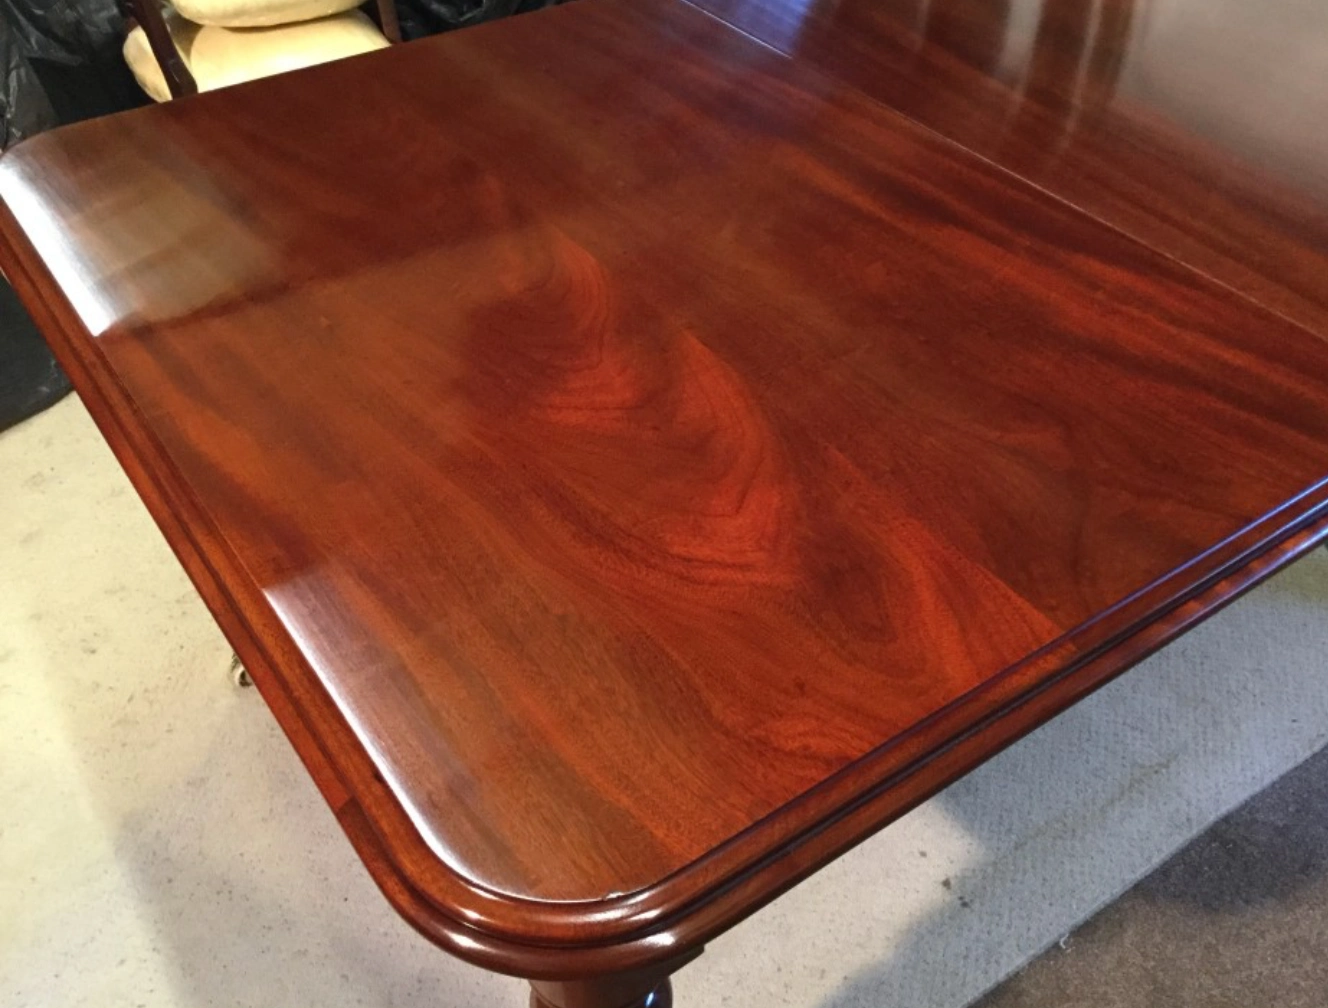
But can this traditional, labour-intensive finish be achieved at home by a non-professional? The short answer is: yes—with the right tools, environment, and a fair bit of patience.
What Is French Polishing?
French polishing is the process of applying shellac (a resin secreted by the lac beetle) in thin layers to achieve a glass-like finish on wood. It enhances the depth and warmth of timber such as mahogany, walnut, and rosewood, making it a popular choice for restoring fine antiques or adding elegance to wooden surfaces.
Can You Do It at Home?
Absolutely—but it’s not for the faint of heart. This finish requires skill, a controlled environment, and a good eye for detail. If you’re up for the challenge, French polishing at home can be deeply rewarding.
That said, it’s best to begin with smaller or less valuable pieces until you’re confident in your technique. Let’s walk through the process.
? Tools and Materials You’ll Need
- Shellac flakes or ready-made French polish
- Denatured alcohol (methylated spirits)
- Polishing mop/pad (cotton wool wrapped in lint-free cloth)
- Fine abrasive paper (320–400 grit)
- Wire wool
- Flexible scraper or old credit card
- Soft cloths and dust mask
- Veneer hammer or block (for re-gluing veneer)
- Linseed oil (optional for lubrication)
- Pumice powder (for grain filling)
- Shellac sticks (optional for dent repair)
?️ Step-by-Step French Polishing Process
Step 1: Surface Preparation
- Clean thoroughly using warm water and mild detergent, or white spirit for wax removal.
- Inspect for damage or loose veneer—tap the surface; a hollow sound may indicate detachment.
- Smooth with fine sandpaper, following the grain. Remove all dust before proceeding.
? Tip: Don’t skip preparation—any imperfection will show through the glossy finish.
Step 2: Prepare Your French Polish (Optional)
If you’re mixing your own shellac:
- Combine 250g shellac flakes with 1L methylated spirit.
- Let it dissolve for 24 hours in a sealed container, shaking occasionally.
Step 3: First Application
- Make a polishing pad by wrapping cotton wool in lint-free cloth.
- Dip the pad into the polish and squeeze out excess. Add a drop of linseed oil to lubricate.
- Use circular motions to apply a thin, even coat. Avoid pausing—this can cause sticking.
- Allow several hours to dry.
Step 4: Fixing Veneer or Dents (if necessary)
- Loose veneer? Try applying a low heat (rayon setting) over brown paper with an iron, then press down with a veneer hammer or hardwood block.
- Filling dents? Use colour-matched shellac sticks—melt and apply, then trim flush with a chisel.
Step 5: Build Up Coats
- Sand lightly between coats with 400-grit paper.
- Reapply polish using circular or figure-eight motions.
- Each coat should blend seamlessly with the last—build thin layers, allowing 20+ minutes drying time between applications.
- Aim for 6–12 coats depending on your desired depth and gloss.
Step 6: Grain Filling (Optional for Ultra-Smooth Finish)
- Sprinkle fine pumice powder onto the surface.
- Work it in with your polishing pad dampened with thinned shellac.
- Buff off excess with a clean cloth.
Step 7: Spiriting Off
This step removes residual oil and perfects the gloss:
- Use a clean pad charged only with methylated spirits.
- Lightly stroke along the grain without stopping or pressing too hard.
Step 8: Buffing and Final Polish
Once fully dry, buff gently with a lint-free cloth to enhance shine.
- Avoid placing items on the surface for 7–10 days while the finish hardens.
? Ongoing Maintenance
- Dust with a dry cloth—no wet cleaning.
- Avoid hot mugs, alcohol spills, and sharp items.
- Use coasters and pads to protect from heat and moisture.
? Is It Worth Doing at Home?
Yes—if you’re patient and detail-oriented. French polishing is a beautiful, historic finish that rewards effort with stunning results. However, if you’re working with a valuable heirloom or unsure about the repair work, we recommend calling in professionals.
Let the Experts Help
At J&D Sprayers & Makeovers, we specialise in traditional wood finishes like French polishing as well as modern spray techniques for furniture, floors, and fixtures. If your project feels overwhelming or you want flawless, long-lasting results—get in touch.
? Contact us today for a free consultation or quote.
Let’s bring out the best in your wood.