The growing popularity of wooden and vintage-style furniture has inspired many homeowners to breathe new life into old pieces. Whether discovered in a grandparent’s attic or picked up at a flea market, these wooden gems often need some care before they can shine in a modern interior.
The good news? Restoring old furniture is much easier than it looks — and spray painting is one of the most efficient methods, especially for larger items. With the right tools, materials, and a bit of preparation, you can transform tired furniture into something truly stunning — all without the need for professional help.
What Paints Can You Use for Spray Painting Furniture?
To achieve a smooth, even finish, you need paints and lacquers that are suitable for spray application. Thicker paints may clog the spray gun unless properly thinned, so always follow the manufacturer’s viscosity guidelines. Use a viscosity cup to check whether the paint is at the right consistency.
Make sure to match the thinner with the type of paint:
- Water-based (acrylic) paints can be diluted with water.
- Solvent-based products (like lacquers) require appropriate thinners, such as nitro thinners.
For more demanding jobs, high-performance or airless sprayers can handle thicker coatings with minimal thinning — although they come at a higher price point.
Recommended Paint Types
- Acrylic Paint – Fast-drying, easy to clean, and suitable for both wood and metal. Available in matte, satin, or gloss finishes. Ideal for quick projects, though less resistant to scratching or impact.
- Alkyd/Phthalic (Oil-Based) Paint – Great adhesion to wood, MDF, and chipboard. Forms a tough, elastic coating and can sometimes be applied over existing lacquer (if in good condition). However, it has a strong odour and a long drying time.
- Acrylic Lacquer – Common in automotive finishes, this lacquer delivers a high-gloss surface that can be polished to a mirror effect.
- Polyurethane Lacquer (2K) – An industrial-grade finish suitable for nearly any surface: wood, veneer, plastic, or metal. Available in gloss, satin, or matte finishes. Offers excellent durability but requires professional-grade equipment and spraying experience.
How to Prepare Furniture for Spray Painting
Preparation is the foundation of a great finish. Follow these steps to get your furniture ready:
- Remove previous coatings – Sand off paint, stain, or lacquer with 240-grit sandpaper. For larger surfaces, use a detail or orbital sander. Avoid coarse sandpaper to prevent deep scratches.
- Remove wax – Use a wax remover if the surface has been previously waxed.
- Degrease oily wood – Clean with a degreasing agent to ensure proper adhesion.
- Strip peeling finishes – Use a suitable paint stripper if needed. Rinse thoroughly and allow the surface to dry for 24 hours.
- Dust removal – Vacuum or brush off all dust and residue. A shop vacuum works best.
- Fill imperfections – Use a finishing filler for small defects, then a sprayable levelling filler for deeper ones. Sand between applications.
- Apply primer – Use an acrylic primer to cover micro-defects and improve paint adhesion. Once dry, sand gently with 400–600 grit and remove dust.
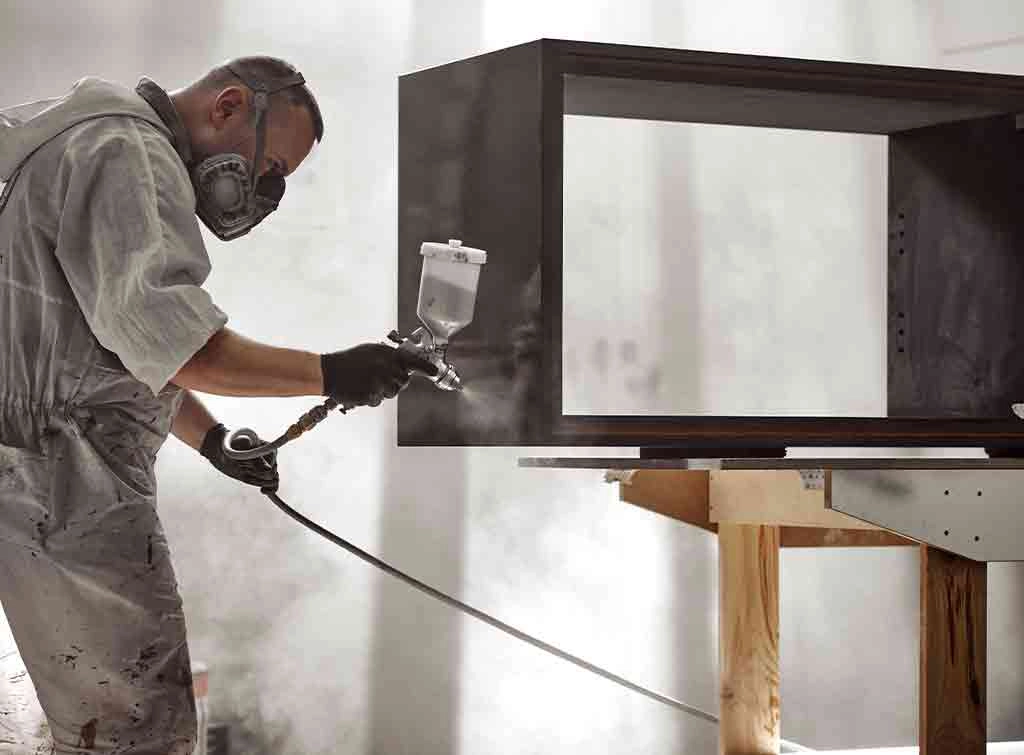
How to Spray Paint Furniture
Spray painting furniture requires consistency and control.
Key Tips:
- Keep the spray gun 25 cm (10 inches) from the surface.
- Move in straight, overlapping strokes, keeping the gun at a 90° angle.
- Avoid pausing mid-surface — it can cause uneven drying or visible lines.
- For fine details, you may reduce the distance slightly (never closer than 15 cm).
- Practise on a scrap board before starting the actual piece.
Safety and Practical Considerations
- Protective gear is essential – Always wear a respirator mask and safety goggles.
- Shield the surrounding area — even outdoors — from overspray.
- Spray painting is not ideal for intricate carvings or tight corners — use a brush for these areas.
- Allow painted furniture to dry in a well-ventilated, dust-free space.
Summary
Spray painting is a fast, efficient, and affordable way to restore old furniture — from wardrobes to dining tables and doors. With proper prep work and the right materials, you can achieve a professional-quality finish at home. While it’s not ideal for detailed or heavily ornamented pieces, it’s the perfect solution for breathing new life into large, flat surfaces with minimal effort.