Scotland’s One and Only Specialists in Spray Painting & Makeovers

Shower Tray Repair and Respraying: A Complete Guide for Homeowners

Shower Tray Repair and Respraying: A Complete Guide for Homeowners

July 28, 2025

Shower trays take a beating over time. Whether it’s chips, cracks, stains, or discolouration, these issues can make even a clean bathroom look tired and uninviting. The good news? You don’t always need to replace the whole tray. With the right materials and approach, many problems can be fixed quickly and cost-effectively — especially when resurfacing is done professionally.

In this guide, we’ll walk you through the essentials of shower tray repair and respraying, covering everything from damage assessment to maintenance.


Assessing the Damage

Before jumping into a repair, it’s important to understand the type and extent of damage:

  • Cracks and chips are the most common issues and can lead to water leaks if left untreated.

  • Discolouration and wear may only affect the surface but still make the tray look old.

  • Structural damage near the waste or corners may indicate deeper issues and often requires a more thorough repair or reinforcement.

If the damage is minor, a confident DIYer might handle the repair. But for larger cracks, repeated leaks, or if the tray is made from specialist materials, it’s safer to call in professionals.


Materials and Tools You’ll Need

The type of materials you need depends on the kind of tray (acrylic, fibreglass, or stone resin) and the severity of the damage. Common repair materials include:

  • Epoxy or acrylic filler for chips and shallow cracks

  • Two-pack resin systems for deeper structural fixes

  • Primers and coatings suitable for wet environments


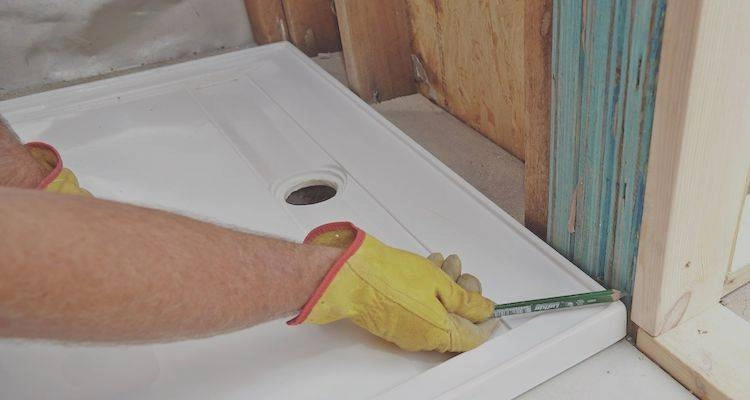
Tools for the job often include:

  • Sandpaper or an electric sander

  • Degreaser and cleaning cloths

  • Applicator tools like spatulas and brushes

  • Spray gun or aerosol enamel for the respray

Choosing the right products for your shower tray’s material is key to long-lasting results.


Repair Techniques for Common Issues

For basic repairs:

  1. Clean and degrease the surface thoroughly.

  2. Sand down the damaged area to remove loose particles and rough edges.

  3. Apply filler or resin in layers, allowing each to cure properly.

  4. Sand again for a smooth, flush finish before respraying.

For larger cracks or impact damage, reinforcing the underside with additional resin and mesh may be necessary. If the tray is too damaged, it might be more cost-effective to replace it.


How the Respraying Process Works

Once repairs are done, it’s time to restore the finish:

  1. Preparation is everything – clean, degrease and sand the entire surface.

  2. Use a primer designed for wet areas and let it fully cure.

  3. Apply topcoats such as Dulux Renovation Range or other two-pack enamels.

  4. Aim for a non-slip finish – essential for safety in a wet environment.

Professional refinishing gives better adhesion, smoother finishes, and better durability compared to DIY sprays.


DIY or Call a Pro?

Go DIY if:

  • You’re confident with tools and the damage is minor.

  • You’re only dealing with cosmetic issues like small chips or light stains.

Call a professional when:

  • Cracks are deep or near plumbing.

  • The tray is leaking or has soft spots.

  • You want a flawless, long-lasting finish.

A professional service also saves time and hassle and often includes warranties for peace of mind.


Cost Breakdown: Repair vs Replacement

  • DIY kits start from around £25–£50, but expect to pay more if tools are needed.

  • Professional repair and respraying usually costs between £250–£500, depending on the damage and finish.

  • Replacement trays can be £300–£600+, plus the cost of retiling, plumbing, and labour — often exceeding £1000 in total.

In most cases, resurfacing is the more budget-friendly option, especially if the tray is still structurally sound.


Aftercare & Prevention Tips

To extend the life of your repaired or resprayed tray:

  • Avoid harsh cleaners like bleach or abrasive pads.

  • Wipe down regularly to prevent soap and mineral build-up.

  • Don’t drop heavy items onto the tray.

  • Check silicone seals regularly and reapply if needed.


Specific Shower Tray Problems & Solutions

  • Cracks around the waste often point to movement or poor installation. These should be reinforced, not just filled.

  • Impact damage from dropped items usually affects resin trays and can be repaired with a two-pack system.

  • Stone resin trays may need specialist materials due to their dense construction.

The lifespan of a shower tray can be 10–15 years or more with proper care. Resurfacing can extend this significantly without the need for full replacement.


Final Thoughts

Shower tray repair and respraying is a smart, affordable solution for tired or damaged trays. Whether you’re a DIY enthusiast or looking for a professional service, understanding the process helps you make the right decision.

At J&D Sprayers & Makeovers, we specialise in professional bath and shower tray resurfacing across Scotland. With over 15 years’ experience, our technicians deliver smooth, long-lasting results using industrial-grade coatings tailored to your tray’s material.

Need help with your shower tray?
Contact us today for a free quote – and give your bathroom a new lease of life without the cost and mess of full replacement.